Monday, January 23, 2012

Scentsy Spring/Summer 2012 SNEAK PEEK!

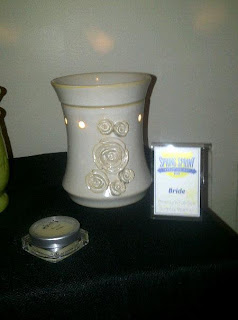
While this is not home related, many of you know that I have been selling Scentsy for almost 2 years now. Today, I got a super secret sneak peek at some items that are coming up in the new Spring/Summer catalog! I thought I would post them here to share with my friends and family. Remember, you can buy from me directly at www.amies.scentsy.us


 These are new Scentsy Baby Buddies


 Scentsy Solid Perfumes


 This is the Heartfelt warmer- rumored to benefit the American Cancer Foundation


 These are part of Scenty's new fondue company


Sunday, January 22, 2012

How To Remove Tacky Tape From Walls- In ONE Step!

So, I made the mistake of using blue tacky tape on my walls to hand a collage of pictures. I thought "Hey, we won't be moving for a while, who cares if it ruins the walls?"

 Fast forward one month later, to when my husband decides he wants to buy a house. With only two weeks left to pack, I decided to tackle my blue tacky mess and get it out of the way:


I cant seem to rotate this photo, but you get the idea!
Anyways, after experimenting, I found the perfect way to remove the tacky stuff from the wall. My solution: scotch tape!

I used this kind, because it's what we had in the house:

Just place the scotch tape over the blue tacky tape, and slowly pull back. If you pull back too fast, it might take some paint with you. 

Repeat this about 4-5 times per spot, and it will be flawless! No more scrubbing and pulling to get that gunk off your walls!


Wednesday, January 11, 2012

DIY Hanging Strand of Mirrors

 My first project for the new house is a decoration I made for the dining room. We plan on going with a light green and white color scheme for the dining room, and I wanted something fun to hang from the ceiling in one of the corners.

I picked up 4 of these square mirrors at Ikea for only $2.99 a piece. The do have them available in different colors too.
You can find them online at http://www.ikea.com/us/en/catalog/products/90044151/
They came with small little eye hooks to put on the top and bottom of the mirror. Screw those in, as that will be what connects each mirror.


I picked up a green paint stain from Ikea also. It took 4-5 coats per side, but I had plenty of paint left (almost 3/4 can) for other projects.


You will want to paint both sides of the mirror if you decide to paint.


When they are dry, you want to connect each of the eye hooks that you installed with ribbon, string, yarn, or whatever you choose to use. I used security ties, because it keeps each mirror from completely spinning around. I got a pack of those for 88 cents at Wal-Mart:
After you secure the mirrors together, you should end up with something like this!:

Sorry for the photo quality. I had no where to hang it until we move, so I had to hang it off the plant hook on our balcony, and the sun was really bright. But, I think it turned out great!

Total Cost: $19.50
Total Time: 60 mins

The Home

Hello! Thanks for coming to read my first blog :) The purpose of this page is to introduce you to me and my husband's new home, and for you to follow my journey as I dive waist deep into DIY projects for our new, little home!

A little background info on us:
Who we are: Amie (me) and Evan.

We also have 2 cats, Bunny (left) and Oliver (right) who will also be enjoying the house with us!


Our home history:
Evan and I have rented apartments since we started dating in 2008. We first rented a small house with a roommate until after our engagement in 2009. We then rented an over-priced, 900 sq. foot apartment for the next year while I was still in college. We moved across the street (literally) to a bigger, cheaper apartment in 2010. Evan's job transfer in 2011 had us move about 80 miles north, to a brand new apartment in a great area. We loved this apartment, but we feel we were wasting money we could be putting towards our own place.

So at the end of December 2011, we accepted a counter offer on our little Cape Cod house on Elm St that we fell in love with. Our closing date on the home is February 3rd, and we are so excited to make it our own! It is a 3 bed/2bath home with a partially finished basement.

*PLEASE NOTE, THESE ARE THE REALTOR'S PHOTOS OF THE HOUSE. THIS IS NOT OUR DECORATING OR FURNITURE*

 Our little Cape Cod!
 This to me is the room that has the most potential- the front porch.
 There is a 2 car detached garage that leads out to a private alley. There is a newer fence in place, which is not pictured here.
This is the living room with the amazing fireplace. All of the wood floors are original.


This is the room between the living room and the kitchen. This is what is going to be the office area for us.

Another view of the office area into the living room.
Here is our kitchen. It's going to need a tiny bit of work.

Another view of the kitchen.
Here is the dining room. This area is going to need the most work.
Here is the downstairs bathroom. Not much will be changing here.
And the master suite, which is in the old attic. Love this space, but needs some work!
And the master bathroom bathtub. Love.

We are so excited for all of the potential we have for this house, and glad you are along for the ride!